
I started a blog to earn a living for my family and to add value to other people’s lives. At first, I never knew where to start blogging and I was overwhelmed by how many things I have to do on how to start a blog.
I was so confused about how to register a domain name, choose a hosting, choose a blog theme, and everything about blogging!I read so many posts about how to use WordPress and which features should one blog have, and I spent hours and hours researching and planning how can I build a blog. Thankfully, it all worked out in the end and I’ve learned a ton of lessons since the day I started my blog.
I do know that starting a blog can be intimidating, which is why I’ve created this free step-by-step blog tutorial to teach you how to build or start a blog. To save you time and from the tedious process involved in setting up a blog.
What Is a Blog?
A blog can be an online journal or an informational website where you can impact or improve plenty of people’s lives. It can be used for personal use or for public access, to express your thoughts and creativity.
Plus, starting a blog is also where you’ll need to update frequently by adding a new post, to engage your audience. Which helps in driving traffic to your blog and in allowing your business to grow.
How will you know If Blogging Is the Perfect Choice for you?
Blogging isn’t easy it requires an incredible amount of work and patience which is often unrecognized as people easily see the benefits of blogging. In reality, blogging isn’t a quick path to riches, it takes a long time to succeed.
I know that some bloggers succeeded in a year or in a short amount of time but most bloggers take a long, long time to succeed. In fact, there are millions of bloggers and only a small percentage of them achieve their goals.
Starting a blog is easy but to succeed, you have to work hard to create content that matters to a lot of people. You’ll need to persevere, despite not seeing any progress in your blog for a long time. This is very difficult as I have gone through a lot of heartbreaks by not seeing any audiences to my blog despite working hard.
Despite all of this, blogging is an awesome way to express yourself and a great way to open yourself to new opportunities, and if you enjoy writing and you want to have a creative outlet then you should go for it. Give it a try for a least a year then decide if blogging is for you.
What are the Benefits of Starting a Blog?
Starting a blog was for me an emotional rollercoaster. There are times when I was sad and disappointed when reality doesn’t meet my expectation, but most of the time blogging makes me feel excited and happy over the simplest things.
Like a lovely comment, growing traffic, and a new follower. For these reasons, I am truly thankful.
I can proudly say to you, that ever since I started a blog, never once did I regret it because of all the lessons and benefits I’ve gained. So, here are five popular reasons why a lot of people including myself decided to start a blog.
- Having a blog is great for your resume and it helps you get a better job because employers prefer to hire people who are capable of starting a business and have a strong online influence.
- Having a blog helps you stay knowledgeable in your field because creating new content for your blog needs research. Through research, you’ll be able to learn something new which can enhance your quality of life.
- You can express yourself through blogging much like a personal diary.
- Blogging is a great way to help people by creating amazing content that can inspire, motivate and educate your audiences.
- Building a successful blog can give you flexibility and freedom that allows you to earn money while having the independence to do what you want and when you want.
Why should I Pay for Web Hosting?
Hosting your site on a free server is possible. However, if you are serious about blogging, and if you see it as a business, then a paid hosting plan is the best choice that you’ll ever make.
For the reason that buying a paid hosting plan will give you a permanent website address, e.g., www.mywebsite.com, and will give your website a more professional look that audiences always look for in a blog.
It will also allow you to have control over every aspect of your site, and this includes advertising content to your site and partnering with known brands.
HOW TO SET UP A BLOG:
Step #1 Pick a Niche
Picking a niche is extremely important. This step is where you will be deciding what topics you want to write about.
You’ll need to make sure that the niche that you’ll be picking is what you are most passionate about. If you are not passionate about the niche, writing about it will be such a chore that could un-motivate a lot of people.
Once you already have an idea of a niche that you would like to do. I suggest that you should make sure that the niche you have chosen has enough audience interest. Then research its niche size, competitors, and monetization potential.
Tip: You can brainstorm niches in google trends and look at popular products on Amazon.
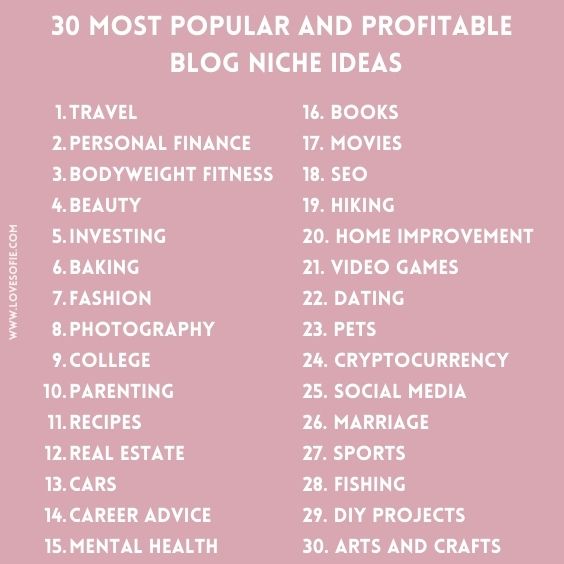
If you are still struggling with choosing a niche for your blog, here are some of the most popular and profitable blog niche ideas.
Step #2 Have a Domain Name and Hosting
Domain:
A domain is the name of your blog. It is an important part of your blog because it creates the first impression. You can choose a name that is related to the topics you’re going to write about or choose a completely random name that is unique and memorable.
Naming your blog is also a matter of trial and error, it took me several tries because all of my previous name ideas were already taken. I suggest checking your ideas in Namecheap to check the blog name availability.
Although you can get free domains on some web hosting sites like Bluehost, I still chose to get my domain name from Namecheap because of its free forever domain privacy.
It is also to keep my domain name separate from my web host because I’ve learned that keeping your domain and web host is the safest choice for bloggers to avoid complications such as domain name loss.
Plus, keeping it separate will allow you to easily switch to another web host provider if you are disappointed with your web host provider services.
Doing so will ensure that your domain name will not be trapped with your current web hosting provider once you decided to transfer to another web host.
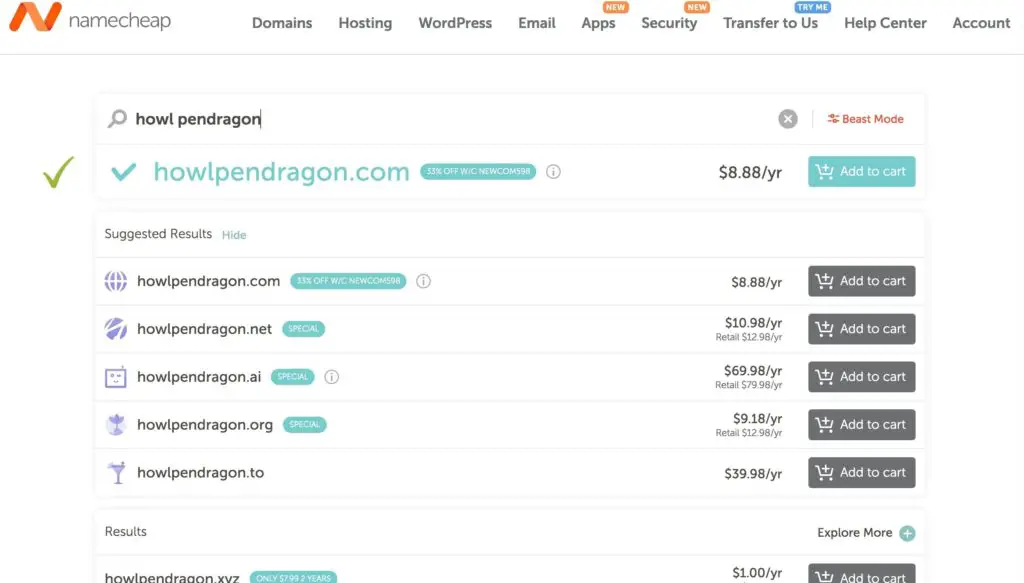
The picture above is an example of an available domain name, where you can choose .net, .org but I highly suggest choosing .com because it is the most popular choice for the majority of websites, therefore will make people assume that your website ends in .com. Plus, choosing .com will lend credibility to your brand.
If you don’t know how to connect your domain to your web host like Bluehost here is a tutorial to guide you. You can also ask for assistance with your blog hosting, I asked for assistance from Bluehost customer service, and they gladly did it for me.
Hosting:
Ready to launch your blog? Let me make it easy for you. As a seasoned blogger, I can vouch for Bluehost without hesitation. It’s not just affordable, it’s tailored for beginners like you, ensuring a smooth start to your blogging journey.
What sets Bluehost apart? Impeccable customer service. Trust me, I’ve been there – broken sites, rookie mistakes – and Bluehost has always been my lifesaver with lightning-fast support.
Starting at just $2.95 a month, their basic plan is all you need to kickstart your blog. But if you’re after extra perks and benefits, the Plus or Choice Plus plans are your go-to options.
Why wait? Click the link below and let Bluehost pave the way for your blogging success. It’s time to turn your passion into a thriving online presence!”
Steps to get your site live:
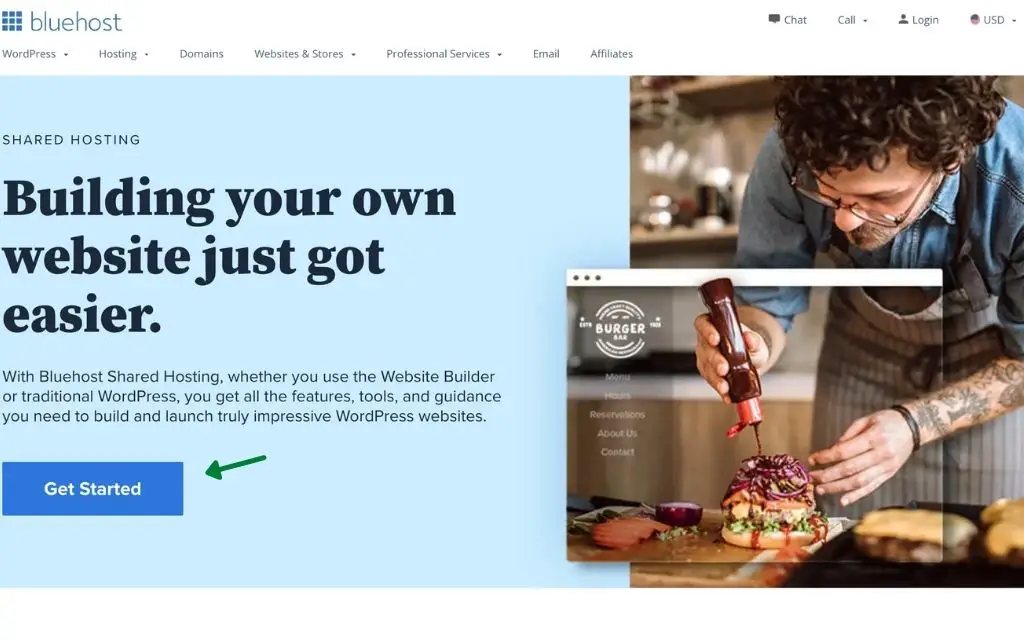
1. Click Here to go to the Bluehost Website and Click the button that says “Get Started”
2. Select your Plan
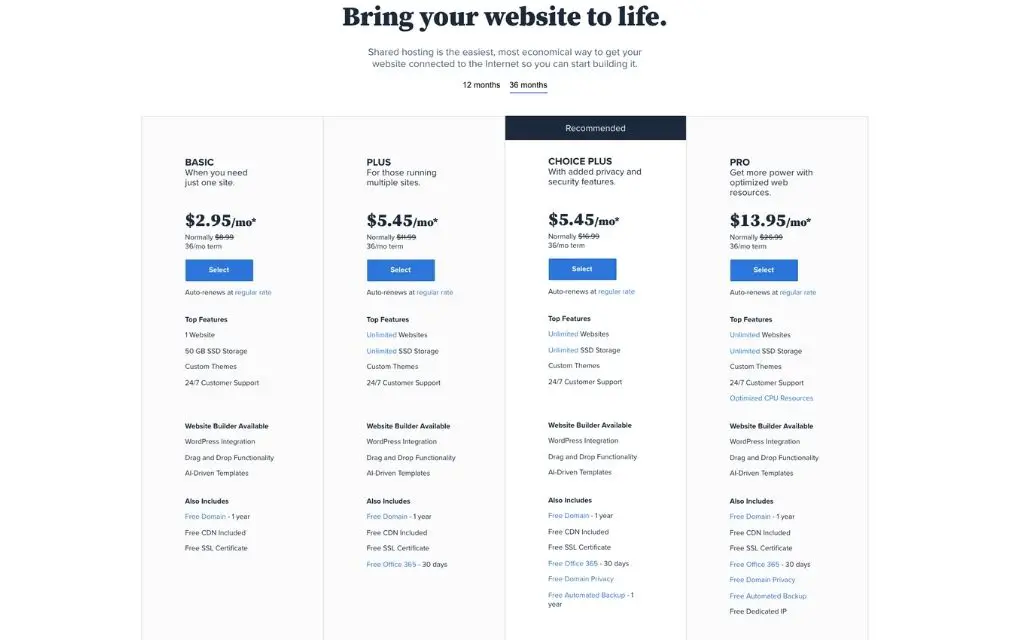
For beginner bloggers, I recommend getting the basic plan. However, if you need unlimited websites and storage, then choice plus is the plan for you.
3. Pick a Domain Name
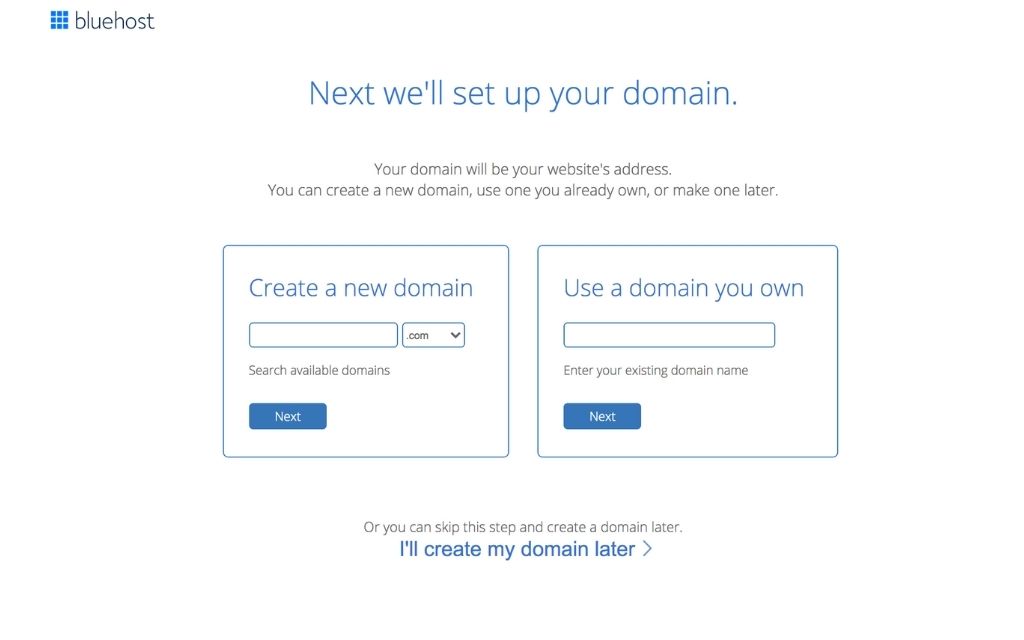
If you want to have a domain from Bluehost, use the “create a new domain” on the left side and type in your domain name and see if it is available.
While if you already have an existing domain, use the right side and type the existing domain that you have bought from Namecheap or from any other domain registration company.
4. Fill out the Registration Page
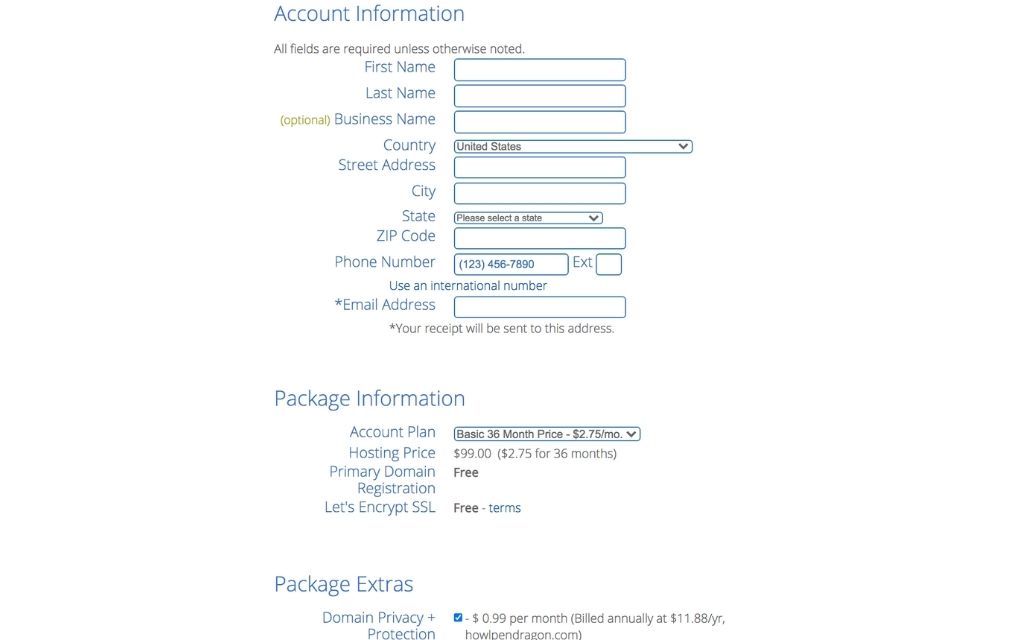
In this step, you’ll need to fill out your account and billing information. You’ll also have to decide your account plan whether if it’s 12 months or 36 months. The 12-month plan has a lower upfront cost but the 36-month plan has the lowest monthly rate.
After the package information, you’ll see the package extras. These package extras are not required and checking all of them will only make you spend more.
The only package extra I’ll recommend is the Domain Privacy + Protection, this will keep you safe and will keep your personal information hidden.
If you bought a domain from Namecheap, the Domain Privacy + Protection will not appear in your package extras because you already bought a domain that includes a free forever domain privacy protection.
5. Create your Account
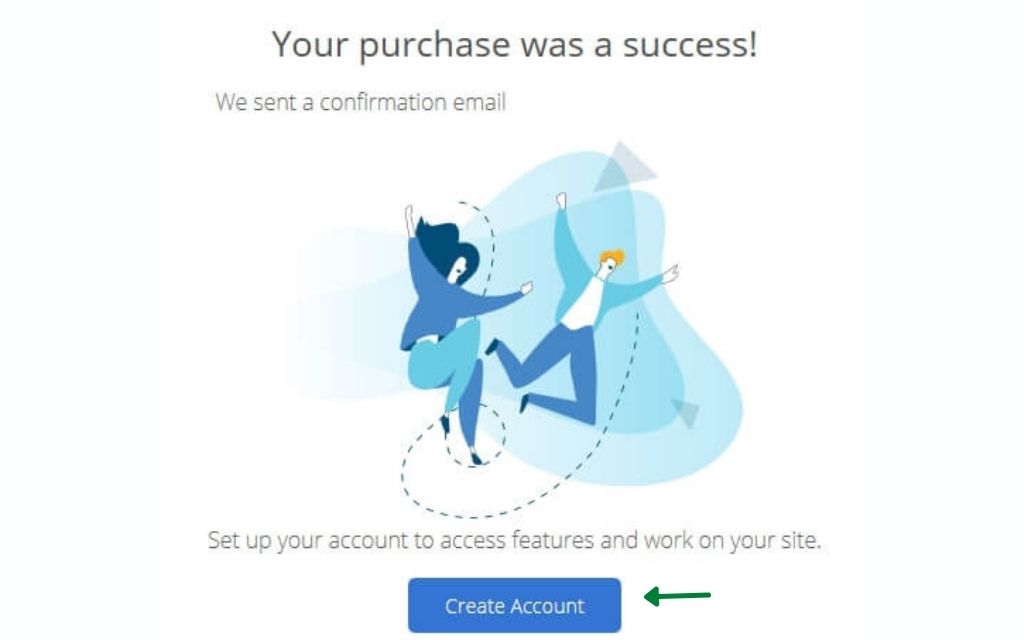
Click the “create your account” button and start setting up your password. When setting up your password it is the best practice to use a password that you haven’t use in any of your accounts. Make sure that it is super secured to protect your website from being hacked.
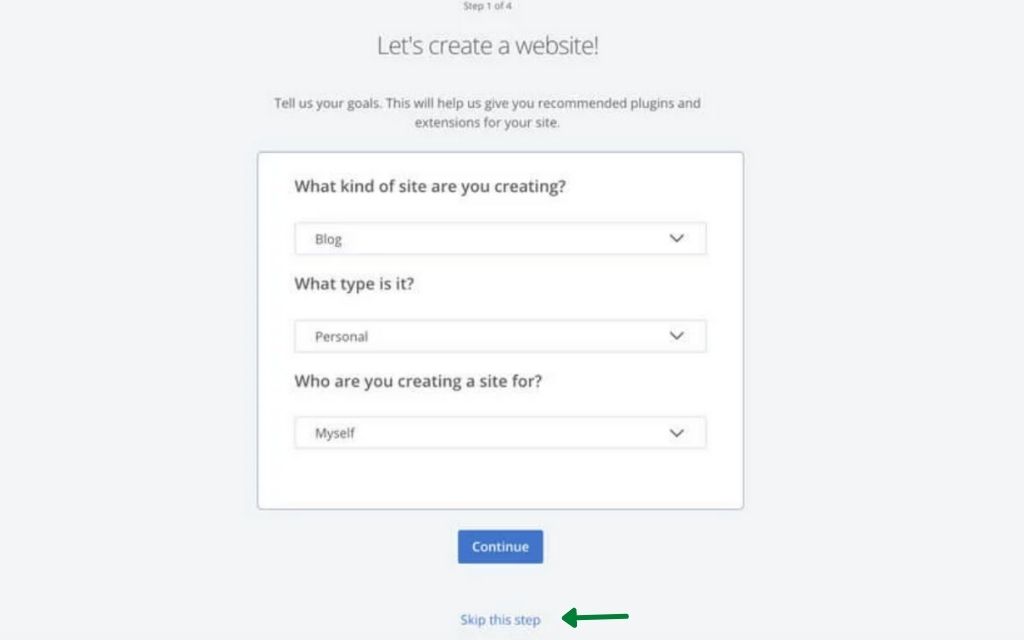
You will be then taken to an installation helper where you can just click “Skip this step” to be taken directly to the dashboard.
6. Install WordPress

Now that you’re done with the previous steps, it’s time to install WordPress and start blogging!
To do so, click the “WordPress” button to install WordPress and be directed to the dashboard, and before anything else, in the WordPress dashboard. go to settings > permalinks and select “Post name”.
This step is important to make sure that all of your future posts have one structure that is understandable to all of your audiences.
Step #3 Design your Blog
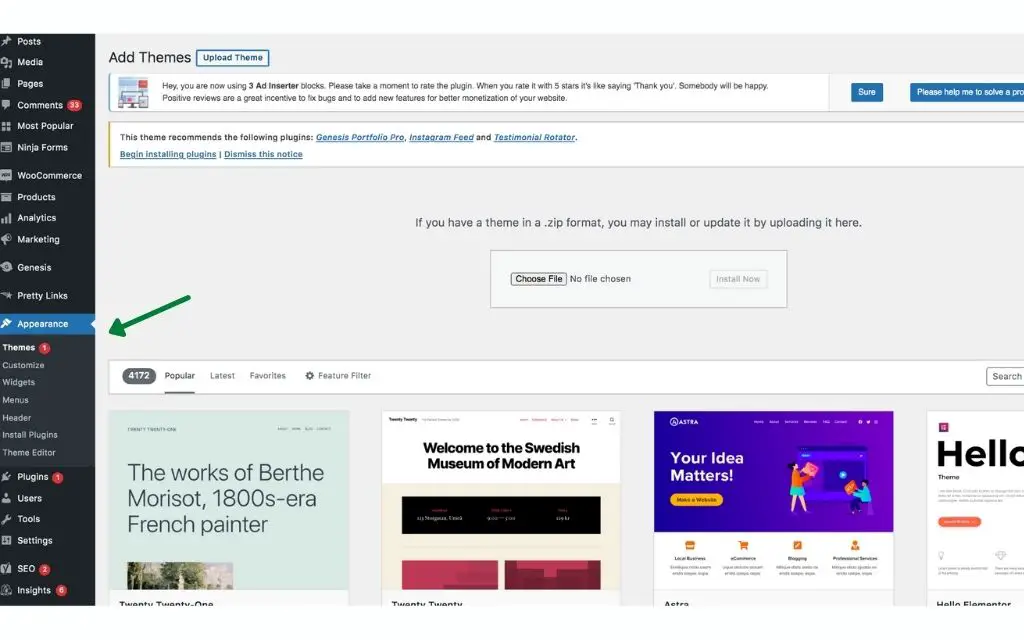
To design your blog, go to your WordPress dashboard, then go to appearance and select themes. There are available free themes available in WordPress that you can choose from.
In my case, I decided to buy a theme from 17th Avenue Designs because I felt like the theme Audrey perfectly matches my vision.
If you are feeling nervous about installing your theme or if you are busy, you can pay 17th Avenue Designs to install your theme for you to make things easier.
However, this service may cost you a lot depending on the theme that you decided to choose.
Knowing this, I still decided to install the theme by myself because even though I want to pay for the service my budget wouldn’t allow me to do so, and to be honest with you, the process of designing a website was so complicated.
I spent weeks learning and figuring out new things that I haven’t encountered before.
Thanks to the documentation of 17th Avenue Designs on how to install their themes and a lot of research, I was able to successfully finish designing my site.
Proud was an understatement of what I felt that day. It felt like all my efforts were so worth it seeing my site complete.
Steps on how to install a Theme that you Bought:
1. In your WordPress Dashboard, go to Appearance and Themes
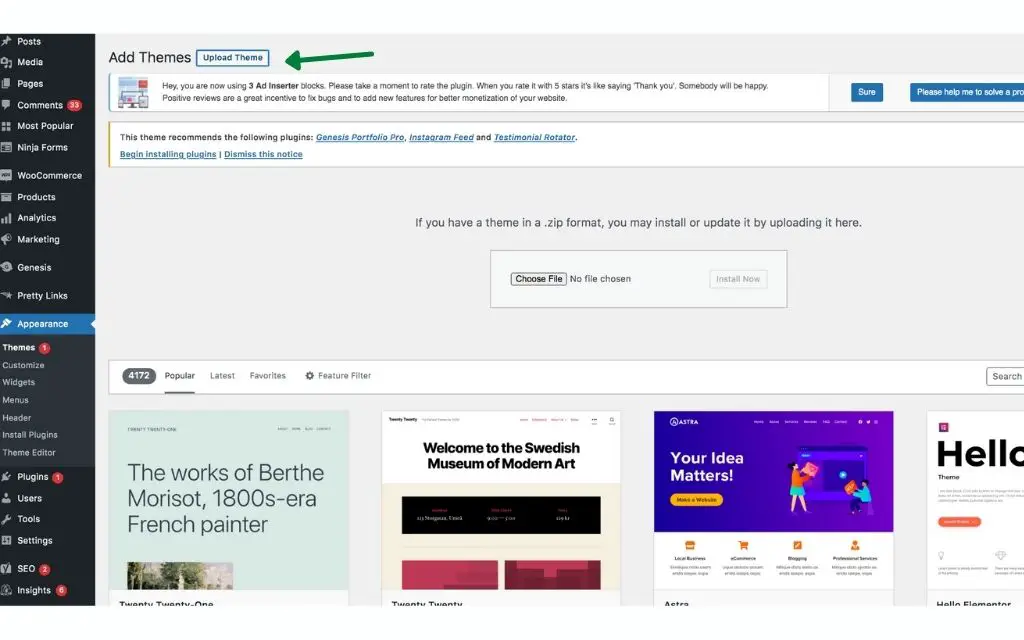
2. Click on the button that says “Upload Theme”
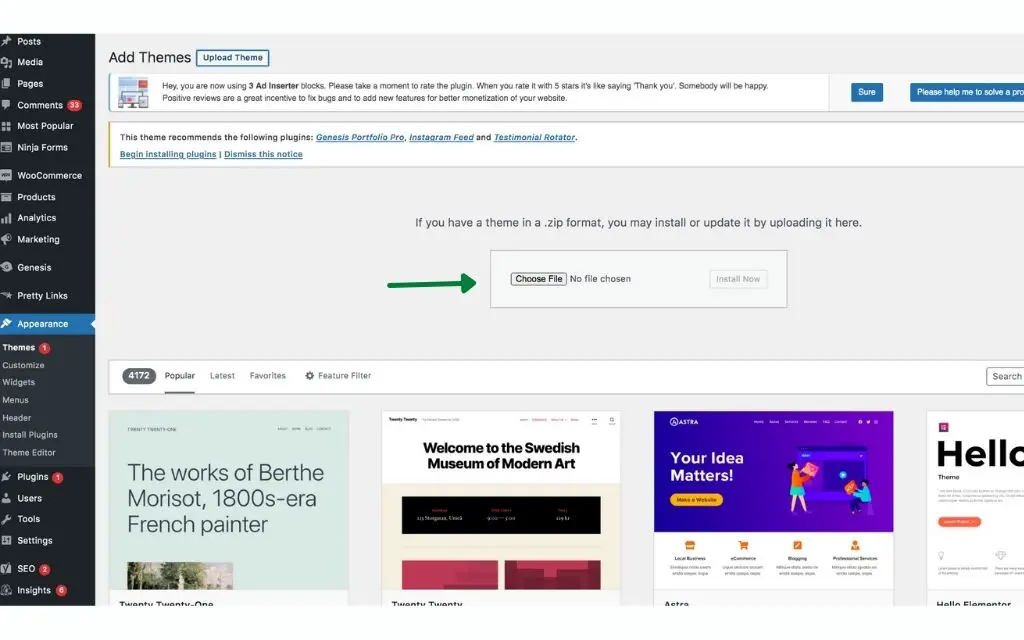
4. Click on the “Choose File” button and find the .zip file from the Theme file that you bought, and then click Install Now.
5. Lastly, click Activate to Install your Blog Theme
Step #4 Add Plugins and Important Pages
Plugins are tools that are essential to bloggers because they can optimize your site for search engines, improve user experience, increase site speed, and so much more!
Plugins I recommend:
- Yoast SEO- To help you write SEO friendly blog posts
- UpdraftPlus- A backup plugin to protect all of your files when you encounter issues such as compatibility errors and hacking.
- WP Rocket- Decreases page load times
- Redirection- This plugin will let you know which post has an error and allows you to redirect it to a URL that you entered.
- MonsterInsights- A google analytics plugin that allows you to track how many visitors you have
How to Install a WordPress Plugin:
1. Go to Plugins > Add New
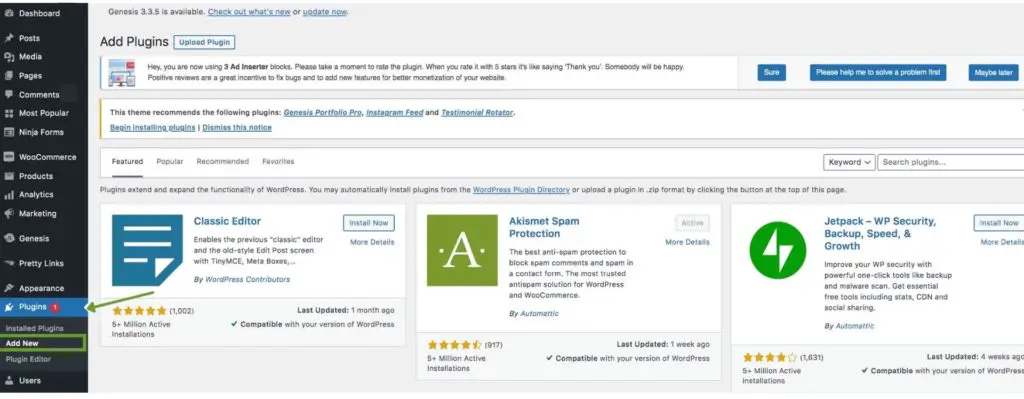
2. Search for the Plugin you’d like to Install (ex. Redirection)

3. Click “Install Now” and “Activate”

There are a few important pages that you should put in your blog especially if you want to monetize your blog. These pages are About Me, Contact Me, Disclaimer Page, Privacy Policy, and Terms of Service Page.
Pages like the Disclaimer Page, Privacy Policy, and Terms of Service Page will protect your blog from any future issues and will make sure that your blog is legal. The best way to get them is for you to hire someone from Fiverr to do it for you or buy Legal Bundles from A Self Guru.
How to Add Pages:
Go to pages and Add New

Step #5 Write and Publish Blog Content
It’s time to start writing your first blog post! And a good rule to write good content is to keep it lengthy and informative. Audiences always want a post that will help them, so always keep it in mind to provide as much as information you can give.
Five Tips in Writing Blog Posts:
- Research and create an outline– Writing blog posts takes a lot of time. To make things easier and faster, research first and create an outline of what you want to talk about before creating a new post.
- Write compelling headlines– Audiences always look at the headline before clicking on a post. I use MonsterInsights Plugin when it comes to writing compelling headlines because they have a built-in headline analyzer tool that helps me a lot. I also found that using numbers and “How to” on your headline is effective in writing clickable headlines.
- Add Images– Audiences processes visual content faster. You can add images by taking your pictures or from stock photos
- Break it up- Keep your paragraphs short because people usually skim through content and reading one giant paragraph is such a pain to read.
- Optimize your images- Always add alt text to your images for Google to recognize what the image is about.
How to Add a Blog Post:
1. Go to Posts > Add New

You can delete the “Hello world!” post because it is only a default post for every new blogger.
Step#6 Launch your Site and Start Promoting
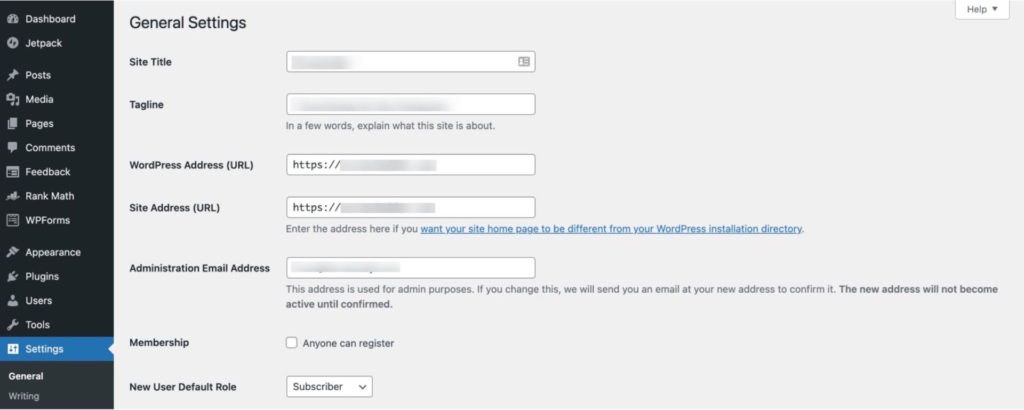
Now that you’re all set, it’s time to launch your site. To do so, go to your WordPress Dashboard, and then go to Settings > General. You’ll see a “Bluehost Coming Soon Page” when you scroll down and just simply turn it off and click save.
Now that you’ve launched your site, what’s next?
Just keep writing as many posts as you can, make sure that it is unique and helpful. Promote your posts on social media, especially on Pinterest by creating and posting pins.

If you are having a hard time designing pins, I recommend having Pinterest templates. It will help you save so much time from creating multiple pins from the same content, and it will stand out increasing your chance to have viral pins.
If you are interested, I offer them at my shop. Where there are 100 Pinterest templates that you can fully customize in Canva.
I also highly recommend using Tailwind for you to schedule pins to go out on Pinterest. It is a great tool that allows you to reach new audiences through its blogging communities.
You can also pin your pins manually; it may be a lot of work but it’s completely free and I managed to pin manually for 1 year before using Tailwind.
Step #7 Monetize your Blog
A great way to start monetizing your blog is to apply in Google Adsense or Ezoic.
Google Adsense is good for new bloggers but doesn’t expect too much income from it especially when you still have low traffic. I also highly suggest signing up with Ezoic since it has a much higher earning potential.
You can also apply to Amazon Associates, AWIN, Shareasale, and Flexoffers to get started with Affiliate Marketing.
Where you can refer products to your audiences, and if they buy the products that you referred, you can earn a small commission from it.
Congratulations! On your new blog and I hope that this guide helped you. Happy Blogging!


One of the best guides. Detailed and easy to follow.